
Cover art, YouTube thumbnails, beats & plugins for creators who mean it.
Explore free toolsFree tools for creators
Preview thumbnails and covers, find a song’s tempo and key, and convert files, all in your browser.
Free to use · No sign-up
Shop by category
All products ↗Plugins
All plugins ↗New beats
All beats ↗Kits, presets & textures
Shop all ↗Custom design
Made from scratch for your release or your channel, and quoted to fit your budget.
Commissions are closed right now. Here’s what I make and where prices start.
See the cover art ↗Producers
Sell your beats ↗What buyers say


Let’s make something.
Send a brief and I’ll reply with a quote and a date.
Commissions are closed for now.
Join the Discord to hear first when they reopen.
Cover art that stops the scroll.
Custom album, EP & single cover art, plus visualizers, made from scratch.
Let’s make your next cover.
Send a brief and I’ll reply with a quote and a date.
Cover art orders are closed right now
Join the Discord to hear first when they open.
More thumbnails
Price and how it works
From brief to finished thumbnail
What to send
Only your name, email and budget are needed to start. Anything else you share gets the first draft closer.
- Your channelA link, so the thumbnail fits the look you already have.
- The videoThe title or idea, and what happens in it.
- Who and what goes inYou, other people, characters, logos, the game.
- Thumbnails you likeLinks or screenshots, from your channel or anyone else’s.
- Your deadlineWhen the video goes up, if there’s a date.
What creators say
Questions about payment, revisions or delivery? Read the FAQ or ask on Discord.
Need a thumbnail for your next video?
Send the idea and I’ll reply with a quote and a date.
Thumbnail orders are closed right now
Join the Discord to hear first when they open.
Scroll-stopping ad creative.
Custom static & social media ad graphics, made from scratch.
Ad portfolio coming soon
I'm still building out this gallery. DM me on Discord to see recent examples in the meantime.
Ask on DiscordLet’s make your next ad.
Send a brief and I’ll reply with a quote and a date.
Ad orders are closed right now
Join the Discord to hear first when they open.
Profile pics with personality.
Custom profile pictures (PFPs), made from scratch.
PFP portfolio coming soon
I'm still building out this gallery. DM me on Discord to see recent examples in the meantime.
Ask on DiscordLet’s make your next PFP.
Send a brief and I’ll reply with a quote and a date.
PFP orders are closed right now
Join the Discord to hear first when they open.
Beats that hit different.
Original beats & instrumentals. 30-second previews. Buy instantly.
Upload a beat ↗New beats dropping soon
I'm getting the catalog up. DM me on Discord if you want to hear something now.
Ask on DiscordNo beats match those filters. Try clearing the search, key, or detune.
Got a beat? Put it in front of new ears.
Free to submit, no listing fees. Every submission is manually reviewed, so nothing goes live automatically. Once approved, it's posted with your name credited and linked.
Looking for something specific?
I make custom beats too.
Put your beat in front of new ears.
Rowen's audience is already here looking for beats. Submit yours below. Nothing is posted automatically. Every submission goes through a manual review first, and only after it's approved does it go live on rowen.work with its own preview player and cover art, crediting you by name and linking your page.
- Free to submit, no listing fees, ever
- Hosted for exposure and credit, free for anyone to download (not for sale through the site right now)
- Manually reviewed by Rowen: most get a decision quickly, but nothing is automatic
- Approved beats go live with your name credited and linked, with a 30-second public preview (not the full track)
Want to actually sell your beat instead of just hosting it? See how that works →
← Back to BeatsGet paid for your beats.
Submitting is always free. Here's exactly how it works if you want to actually sell a beat instead of just hosting it for exposure.
How it works
Five steps from submitting to getting paid.
Submit your beat
Use the upload form same as always. Free to submit, no listing fees, ever.
Get approved
Every submission is reviewed by hand before it goes live. Most get a decision quickly.
Message your price
Once it's live, DM Rowen on Discord with what you want to charge for it.
Quick Stripe setup
You'll get a one-time onboarding link from Stripe. Verify your identity and add your bank account directly with them. It takes about 5-10 minutes. Rowen never sees your bank details.
Get paid automatically
Your beat goes live with a real Buy button. Every sale splits instantly through Stripe: your cut lands straight in your account, no manual payout, no chasing anyone down.
Not 18 yet?
Stripe still lets you get set up. You'll just need a parent or legal guardian to sign off before any money can actually reach a bank account. That's a normal, built-in part of Stripe's own process for anyone under 18, not something specific to this site, and it doesn't change anything about how your beat gets listed or sold.
See the full step-by-step tutorial ↗Quick answers
Do I have to use Stripe?
Yes. Right now it's the only payment method that can verify a sale and automatically split your cut. There's no manual option for an actual sale.
Is submitting still free?
Always. Whether you end up selling it or just hosting it for exposure, submitting through the form has never cost anything.
Does Rowen see my bank info?
No. Identity verification and payouts are handled directly by Stripe, so that part never touches this site or Rowen personally.
How much does Rowen take?
A flat cut worked out per beat when you message your price, not a fixed site-wide percentage.
Stripe setup, step by step.
The full walkthrough for getting a beat set up to actually sell. Pick the track that fits you. The steps are a little different if you're under 18.
Submit and get approved
Upload your beat through the normal submission form. Once it's reviewed and goes live, you're ready to move on to setup.
Message Rowen your price
DM on Discord with what you want to charge. Rowen will confirm the split (Rowen's flat cut plus your payout) before anything is set up.
Get your onboarding link
You'll receive a one-time Stripe Connect onboarding link. It's single-use and expires after 90 days, so use it soon after you get it.
Verify your identity with Stripe
The link takes you directly to Stripe, not this site. You'll enter your legal name, date of birth, address, and basic ID details straight into Stripe's own secure form.
Add your bank account
Still on Stripe's site, you'll link the bank account you want paid out to. Rowen never sees your account or routing numbers. That stays between you and Stripe.
Your Buy button goes live
Once Stripe confirms everything, your beat gets a real Payment Link with the split already built in. No further setup needed on your end.
Get paid on every sale
Each purchase splits automatically. Your cut lands in your bank account through Stripe's normal payout schedule. No invoices, no manual transfers.
Submit and get approved
Same as anyone else: upload through the normal form and wait for approval. Your age doesn't affect whether your beat can be submitted or hosted.
Message Rowen your price
DM on Discord with what you want to charge, same as the 18+ track. The split gets confirmed before setup starts.
Get your onboarding link
You'll get the same one-time Stripe Connect link. Stripe does let you start an account under 18. The extra step comes right after this.
Start your own verification
Enter your own info into Stripe's form same as anyone else. Stripe will flag the account as needing a guardian before payouts can turn on.
A parent or guardian signs off
Stripe requires a legal guardian to confirm the account. They'll need to provide their full legal name, date of birth, the last four digits of their SSN (for U.S. citizens), their address, and agree to Stripe's terms. Stripe tries to verify this automatically first, and may ask for a photo of the guardian's ID if it can't.
Add a bank account
Once your guardian has signed off, a bank account can be linked for payouts. This is still handled entirely on Stripe's side.
Your Buy button goes live and you get paid
Same as the 18+ track from here: your beat gets a real Payment Link with the split built in, and every sale pays out automatically.
Plugins & sound tools.
VST3 plugins for producers and artists, built from scratch.
Want early access?
Get notified when new plugins launch.
Image Resizer
Resize an image to an exact width and height in pixels.
| Original | New | |
|---|---|---|
| Pixels | - | - |
| File size | - | - |
New size
PNG-Up to 8000 px a side
Resize an image to exact pixel dimensions
Type the width or height you need and this image resizer scales the picture to match, keeping its proportions unless you turn that off. It opens PNG, JPEG, WebP and GIF files, resizes up to 8000 pixels on a side, and downloads a PNG. The image stays on your device.
How to use this tool
How to resize an image
- Choose an image or drag one onto the box. Its pixel dimensions and file size appear in the table.
- Enter a new Width or Height in pixels, or pick a Quick scale. Original size puts both back.
- Turn off Keep proportions if you need a shape that doesn't match the original. The picture is stretched to fit.
- Check the new pixel size and file size, then press Download PNG.
Technical details
Shrinking large photos
When you scale an image down to less than half its size, the tool halves it in steps before the final resize instead of jumping straight to the target. One large jump can leave jagged edges on fine detail, and stepping down keeps the result smooth. Making an image bigger works too, but it can't add detail that isn't in the original. Because the output is PNG, a resized photo can have a larger file size than the JPEG you started with. If that matters, run it through the Image Compressor afterwards. An animated GIF is read as a single still frame.
Image Compressor
Make an image file smaller without changing its pixel dimensions.
-compressed to-
-
Pixels: -
File type
This image has transparent areas. JPEG fills them with white; choose WebP to keep them.
JPEG-Quality 75
Compress an image without resizing it
This image compressor re-encodes a picture at a lower quality so the file gets smaller while the pixel dimensions stay the same. Choose JPEG or WebP, set Quality anywhere from 10 to 100, and the page shows the new file size and the percentage saved before you download. It opens PNG, JPEG, WebP and GIF files and runs in your browser.
How to use this tool
How to compress an image
- Choose an image.
- Pick JPEG or WebP under File type.
- Lower Quality until the new size looks right. It starts at 75. The preview shows the compressed result; press Show original to compare.
- Press Download JPEG or Download WebP.
Technical details
JPEG or WebP
WebP usually gives a smaller file than JPEG at a similar quality, and it keeps transparent areas. JPEG opens in almost any software, but it has no transparency, so transparent pixels are filled with white. If the result says the file got larger, the original was already compressed harder than your setting, so lower the quality or keep the file you have. Low settings show first on text and fine lines, so check the downloaded file up close before using it on artwork with lettering. If your browser can't create WebP files, the WebP choice is switched off and says so. An animated GIF is read as a single still frame.
Image Converter
Convert an image to PNG, JPEG or WebP without changing its pixel dimensions.
| Original | New | |
|---|---|---|
| File type | - | - |
| Pixels | - | - |
| File size | - | - |
File type
Transparent areas stay transparent in this file type.
Need BMP, ICO, PDF, HEIC, TIFF or AVIF, or many files at once? Use the File Converter.
PNG-Lossless
Convert images between PNG, JPEG and WebP
Change an image's file type without opening an editor. Load a PNG, JPEG, WebP or GIF, pick PNG, JPEG or WebP as the output, and the page shows the new file size before you download. The dimensions don't change, and JPEG and WebP are saved at 92% quality. The conversion runs in your browser, so the file isn't uploaded.
How to use this tool
How to convert an image
- Choose an image or drag it onto the box.
- Pick PNG, JPEG or WebP under File type.
- If the image has transparent areas and you picked JPEG, choose the color that fills them.
- Check the new file size and press Download.
Technical details
Which file type to pick
PNG is lossless, which makes it the right choice for logos, screenshots and anything with transparency or sharp text, at the cost of bigger files. JPEG suits photos that need to open anywhere, as long as you don't need transparency. WebP keeps transparency and usually produces smaller files than either, which makes it a good default for images on the web. If your browser can't create WebP files, the WebP choice is switched off and says so. For BMP, ICO favicons, PDF, HEIC, TIFF, AVIF, camera RAW or converting a batch of files at once, use the File Converter. An animated GIF is read as a single still frame.
Image Cropper
Crop a picture to a set shape, such as square or story, without resizing it.
| Original | Cropped | |
|---|---|---|
| Pixels | - | - |
Image shape
Your picture already has this shape, so all of it is kept and there’s nothing to move.
PNG-Not resized
Crop an image to 1:1, 4:5, 9:16, 16:9 or 3:2
Pick a shape and this cropper cuts the largest area of that shape out of your picture: Square (1:1), Portrait post (4:5), Story (9:16), Widescreen (16:9) or Photo (3:2). It opens PNG, JPEG, WebP and GIF files, crops without scaling the pixels, and downloads a PNG.
How to use this tool
How to crop a photo to a ratio
- Choose an image.
- Pick an Image shape: Square (1:1) for cover art and profile photos, Portrait post (4:5) for feed posts, Story (9:16) for stories, Widescreen (16:9) for video thumbnails, or Photo (3:2) for a standard photo print. Each one shows the size it will produce.
- Drag the frame in the preview, or use the Position slider, to choose which part of the picture to keep.
- Check the cropped size and press Download PNG.
Technical details
Getting an exact size
The crop keeps every pixel inside the frame, so the output is as large as your picture allows. A 4000 × 3000 photo cropped to 1:1 comes out at 3000 × 3000. If a platform asks for a specific size, such as 1280 × 720, crop to the shape here first and then set the exact dimensions in the Image Resizer. When the picture already has the chosen shape, the page says so and there's nothing to move. An animated GIF is read as a single still frame.
Profile Picture Maker
Frame a photo as a circle or square profile picture and download it as a PNG.
Framing
Shape
Export size
PNG--
PFP maker: circle or square profile picture
Turn any photo into a profile picture. The tool fills a square from your photo, lets you zoom in up to 300% and drag the photo into place, and can cut the result into a circle with transparent corners. It opens PNG, JPEG, WebP and GIF files and downloads a 256, 512 or 1024 pixel PNG. Nothing leaves your device.
How to use this tool
How to make a profile picture
- Choose a photo. It starts centered.
- Drag Zoom to tighten the framing, then drag the preview (or use the position sliders) to move the subject into place. Reset framing puts it back.
- Pick Circle or Square.
- Pick an Export size: 256, 512 or 1024 px, then press Download PNG.
Technical details
Circle or square
Many apps already display avatars as circles, so a square upload is often enough and leaves the app room to frame it. Circle is useful where nothing will crop the image for you, like a website, a stream overlay or a video thumbnail, because the area outside the circle is saved as transparent pixels rather than a solid color; the preview shows those corners as a checkerboard. If the framed part of your photo is smaller than the size you pick, it gets scaled up and will look soft, and the page tells you when that happens. An animated GIF is read as a single still frame.
Color Palette
Pull the main colors out of an image as hex codes you can copy.
Most common color first. Click or tap one to copy its hex code.
Text file-
Extract a color palette from an image
Upload a photo, cover or mood-board image and this pulls out its most common colors as hex codes. Choose anywhere from 3 to 10 colors, click a color to copy its code, or press Download hex codes to save the full list as a text file. It reads PNG, JPEG, WebP and GIF files, and the image is processed in your browser.
How to use this tool
How to get hex codes from a photo
- Choose an image.
- Set the Number of colors you want.
- Click a color under the image to copy its hex code, or press Copy all.
- Press Download hex codes for a .txt file with one hex code per line.
Technical details
How the colors are picked
The image is scaled down to a small sample and every pixel is sorted into one of 4,096 color groups. The groups with the most pixels win, and each swatch is the average of the real pixels in its group, so it's a color that actually appears in the image. That means the palette favors area: a large grey sky will outrank a small red logo. To get an accent color that only covers a small part of the picture, crop in on it first with the Image Cropper. Transparent pixels are ignored, and two close shades can both appear when a color falls on the edge between groups. An animated GIF is read as a single still frame.
Photo Adjustments
Adjust a photo's brightness, contrast and color, then download it as a PNG.
Light and color
Effects Black & white, blur
PNG-Up to 1600 px wide
Free photo editor for brightness, contrast and color
Adjust a photo with six sliders and watch the change as you drag: Brightness, Contrast and Saturation from 0 to 200%, Warmth, Black & white, and Blur up to 20 pixels. It opens PNG, JPEG, WebP and GIF files, and the edited image downloads as a PNG. Editing happens in your browser, so the photo isn't uploaded.
How to use this tool
How to edit a photo
- Choose a photo.
- Drag the sliders under Light and color first, then open Effects for black & white and blur. Brightness, Contrast and Saturation start at 100%, which leaves the photo unchanged. Each slider has its own Reset.
- Press Show original to compare, then press it again to go back to your edit.
- Press Download PNG. Reset adjustments puts every slider back; Start over also clears the photo.
Technical details
Size and how the effects work
Photos wider than 1600 pixels are scaled down to 1600 pixels wide for editing and export, which suits social posts and the web but not large prints. The effects use the same filter engine as CSS, so the download matches the preview. Warmth works by blending in a sepia tone, so high values push the whole image toward brown. Blur is measured on the scaled image, which means the same setting looks stronger on a small photo than on a large one, and strong blur can leave the edges slightly see-through. An animated GIF is read as a single still frame.
Convert Audio to WAV
Save any audio file your browser can play as an uncompressed WAV.
This file’s own sample rate couldn’t be read, so it was decoded at your device’s rate.
Change sample rate or channels Optional · keeping the original
Saves 16-bit WAV only. For MP3, FLAC, M4A, AIFF or 24-bit WAV, use the File Converter.
Convert audio to WAV and change the sample rate
Load an MP3, M4A, OGG, FLAC, AIFF, WAV or other audio file your browser can play and export it as an uncompressed 16-bit WAV. By default the WAV keeps the file’s own sample rate and channels. If you need to, open Change sample rate or channels to resample to 44.1 kHz, 48 kHz or 22.05 kHz, or switch to mono or stereo. Before you download, the line above Download WAV shows the output and roughly how big the file will be. Nothing is uploaded.
How to use this tool
How to convert an audio file
- Choose an audio file. The Original line shows its format, sample rate, channels and length.
- To keep everything as it is, press Download WAV.
- To change the sample rate or switch between mono and stereo, open Change sample rate or channels first.
- Check the file type, sample rate, channels, length and size listed above the button, then press Download WAV.
Technical details
Which sample rate to pick
44.1 kHz is the CD standard and the usual rate for music releases. 48 kHz is standard for video, so match it when the audio is going into a video edit. 22.05 kHz halves the file size compared with 44.1 kHz but loses the high end, which is acceptable for voice notes and rough demos. Switching stereo to mono combines both channels into one and halves the size again. This page only writes WAV. To convert audio to MP3, FLAC, M4A, 24-bit WAV or AIFF, use the File Converter.
The file is decoded at its own sample rate, read from the file header, so Keep really keeps it. When the rate or channels change, your browser’s own resampler does the conversion. A WAV is uncompressed: 16-bit stereo at 44.1 kHz takes about 10 MB a minute, which is why the size is shown before you download.
Trim Silence
Cut the silence from the start and end of a recording without touching the middle.
-
-
Trim silence from the start and end of audio
This tool finds where the sound actually begins and ends in a recording and cuts the silence on either side. It's useful for voice notes, vocal takes and one-shot samples with dead air before the first hit. Quiet gaps in the middle are left alone. Load any audio your browser can play, such as MP3, WAV, M4A or OGG, and download the trimmed result as a 16-bit WAV.
How to use this tool
How to remove silence from a recording
- Choose an audio file. The tool shows how much silence it will remove from each end, and the Original line shows the file’s length and peak level.
- If needed, set the Silence threshold, from -60 to -20 dB. Anything at the edges quieter than this gets cut.
- Set Edge padding, up to 500 ms, so the audio doesn't start or stop abruptly. Reset adjustments puts both back to -45 dB and 80 ms.
- Press Play trimmed audio or Play the last 3 seconds to check the cut, then press Download WAV.
Technical details
Choosing a silence threshold
The default of -45 dB suits most clean recordings. If background hiss or room noise is being kept, raise the threshold toward -30 dB so the noise counts as silence. If the soft start of a note or a breath is getting clipped, lower it toward -60 dB or add more padding. The cut is made at the first and last samples louder than the threshold on any channel, so a single click or pop near the edge will stop the trim at that point.
The threshold is in dB below full scale (0 dB is the loudest a file can store). The waveform is only a picture; the play buttons and the WAV both use the exact samples between the two pink markers, at the file’s own sample rate.
Normalize Audio
Turn a whole file up or down so its peak or average level hits a target.
Gain -
-
Matches peak or average level, not LUFS loudness. To measure LUFS, use Mix Check.
Normalize audio to a target level
Normalizing turns a whole file up or down by one fixed amount so it hits a target level. Unlike a compressor or limiter, it leaves the dynamics of the recording as they were. Load an MP3, WAV, M4A, OGG or other audio file, choose whether to match its peak or its average level, set a target between -24 and -1 dB, and download a 16-bit WAV. It runs in your browser.
How to use this tool
How to normalize an audio file
- Choose an audio file. The Original line shows its current peak and average level.
- Under Match on, pick Peak or Average (RMS).
- Set the Target level. It starts at -3 dB peak, a safe default that can't clip; Reset adjustments goes back to it.
- Check the gain being applied, the new peak and average, and the clipping line, then press Download WAV.
Technical details
Peak or average
Peak moves the loudest single sample to the target, so the result can't clip. It's exact, but two files with the same peak can still sound quite different in loudness. Average matches the RMS level instead, which lines up how loud clips feel more closely. Raising the average can push peaks past full scale, so the gain is capped to keep the loudest sample at -0.1 dB, and the page tells you when clipping protection has limited the gain. This isn't a LUFS measurement, so don't rely on it to hit a streaming platform's loudness target.
The peak is found by reading every sample on every channel, so a single short transient is never missed. The same gain is applied to every sample, and the WAV keeps the file's own sample rate and channels.
MIDI Visualizer
Turn a MIDI file into a falling-note piano roll video, with each track in its own colour.
Soundtrack optional
Video size
1280 × 720, landscape
Tracks
Look
Note style Corners, gaps, opacity, outline
Glow When a note hits the keyboard
Background and keyboard Colours, keyboard, lines, names
Export video
Records in real time, so a 3-minute song takes 3 minutes. Keep this tab open and in front.
WebM1280 × 72030 fpsNo watermarkNo sound
MIDI visualizer: piano roll video from a MIDI file
Drop in a .mid or .midi file and watch the notes fall onto a piano keyboard, with each track in its own color and keys lighting up as notes land. Hide or recolor tracks, restyle the notes and background, add a bounce of the song for sound, and record it all as a video. The file is read in your browser.
How to use this tool
- Choose a MIDI file.
- Under Soundtrack, choose an audio bounce of the same song if you want sound, and pick a Video size: 720p, 1080p, Vertical or Square.
- Under Tracks, untick any you don't want and pick a colour for each.
- Adjust Fall time, and open Note style, Glow or Background and keyboard for finer changes.
- Press Export video, let it play to the end, then press Stop and save.
Technical details
Tempo changes inside the file are followed, so slowdowns and section changes stay in time. With a soundtrack attached, the roll follows the audio's clock, and the audio starts at the very beginning of the MIDI file, so export your bounce from the start of the project too. Recording runs in real time at 30 frames per second, so a three-minute piece takes three minutes, and the video saves as WebM with no watermark. Files that use SMPTE timecode instead of ticks can't be read, so re-export those with standard timing.
Drum kits.
Kits from producers worth knowing about. Most are sold on their own stores, and the links go straight there.

Everything your drum kit needs except the sounds
Set folder colors, artwork banners and hover text for FL’s Browser without Photoshop, and preview them as you go. Free to design; $10 unlocks one complete skin.
Made a kit?
Send it over and it goes up here, credited and linked straight to wherever you sell it. No cut taken, no fee, nothing to sign.
Serum 2 presets.
Preset packs for Xfer Serum 2. Most are sold on their makers' own stores, and the links go straight there.
Made a Serum 2 bank?
Send it over and it goes up here, credited and linked straight to wherever you sell it. No cut taken, no fee, nothing to sign.
Texture packs.
The layers that go over a cover: grain, paper and film overlays, and advisory marks drawn from scratch. Some are sold here, some on their makers' own stores.
Made a texture pack?
Send it over and it goes up here, credited and linked straight to wherever you sell it. No cut taken, no fee, nothing to sign.
Everything else.
Questions, answered.
Payment, revisions, turnaround, refunds and file delivery. Full policies are linked in the footer.
Still stuck? Just ask.
What clients are saying.
Real feedback from real projects, and a spot to leave your own if we've worked together.
No reviews yet
Be the first to leave one below once we've worked together.
Leave a review
Worked with me before? I'd love to hear how it went. Reviews are checked by hand before they're posted, so it may take a little while to show up.
Ready to start your own?
Send a brief and I’ll reply with a quote and a date.
Commissions are closed for now.
Join the Discord to hear first when they reopen.
BPM Finder
Find a song’s tempo from an audio file, or tap along to count it yourself.
Estimated tempo
Sounds twice as fast or slow? Pick the tempo you hear.
Tempo correction for triplet feels ⅔× or 1.5×
Tap tempo
No taps yet
Press Space or T to tap, R to reset
Clears your taps only. The result from your file stays.
Free online BPM finder
Drop in a song and this finds its tempo in beats per minute. It reads any audio file your browser can play, including MP3, WAV and M4A, and gives a whole-number BPM between 60 and 200 with a short note on how confident the read is. The file is decoded and analyzed on your device, not uploaded.
How to use this tool
How to find the BPM of a song
- Click Choose an audio file, or drag the track onto the box.
- Wait for the result. Longer tracks are checked in up to five 15-second sections, and the tempo those sections agree on most strongly wins.
- If the song feels twice as fast or slow as the number, press Half time or Double time. For triplet feels, open Tempo correction for triplet feels and try ⅔× or 1.5×. Each button shows the tempo it would give before you press it.
- For a second opinion, press Tap to the beat (or Space or T on your keyboard) in time with the music. The readout averages your last eight taps, the line under it shows the tempo over all of them and how even they are, and Reset taps (or R) clears only those taps.
Technical details
Why the BPM can read as half or double
The detector listens for hits in two ranges, kick and bass in one and snares and hats in the other, then looks for the spacing that repeats most strongly. A 140 BPM trap beat and a 70 BPM half-time feel share most of that spacing, so either can win. Syncopated basslines and triplet patterns can throw it off by 2:3 in the same way. The correction buttons scale the current reading instead of re-running the analysis, so you can step between options until the number matches what you hear.
Confidence compares the winning tempo with every other tempo the detector considered: high means it stood well clear of the rest, and it counts for more when the 15-second sections agree with each other. It measures how clear the rhythm is, not whether the number matches the way you count it.
Need a beat to go with it?
Browse original instrumentals.
Key Finder
Find a song’s musical key and check whether it’s tuned to standard A=440.
Estimated key
Tuning
Song key finder with a tuning check
This song key finder reads an audio file and names its key, such as A Minor or F♯ Major. It also measures how far the recording sits from standard A=440 tuning, in cents, and when it's off, shows the reference pitch it's actually tuned to. Any format your browser can decode works, including MP3, WAV and M4A, and the analysis runs locally without uploading the file.
How to use this tool
How to find the key of a song
- Choose an audio file or drag one onto the box.
- The tool checks the tuning first, then the key, using the loudest sections of the track.
- Read the key and how confident the read is. The next closest key is listed under it, and a close call says so plainly.
- Check the Tuning section for the offset in cents, the reference pitch and how far to pitch the track to reach A=440.
Technical details
Detuned tracks and relative keys
Tape rips, sample-rate mismatches and deliberate pitch shifts can push a whole track a few cents sharp or flat. When the tuning read is clear, the key is measured against that shifted pitch instead of A=440, and the Tuning section tells you how many cents to pitch the track to bring it back to standard. The most common mix-up is between a major key and its relative minor, like C Major and A Minor, because they share the same notes. When those two are nearly tied, the tool checks the bassline to settle it. Keys are written with sharps, so D♭ Major appears as C♯ Major.
The file is mixed to mono at 8 kHz, and up to three of its loudest 15-second sections are analysed. The strength of each of the 12 notes there is correlated with the Krumhansl-Kessler major and minor key profiles in every key. The best fit is the key, and it counts as a strong match when its correlation leads the next closest key by 0.12 or more.
Need a beat to go with it?
Browse original instrumentals.
Cover Mockup
See your cover art on a phone, a music player card and a vinyl record, and download each as a PNG.
PNG for each mockuprowen.work watermark, top rightMade in your browser; the artwork isn't uploaded
Cover art mockup generator
Upload your album or single artwork and see it in three places: a phone now-playing screen, a music player card and a vinyl record with the art as the center label. Add a track title and artist name and the phone and player mockups update as you type. Each mockup downloads as its own PNG with a rowen.work mark in the corner. Rendering happens in your browser, so the artwork stays on your device.
How to use this tool
How to make a cover art mockup
- Choose your cover art. Any image your browser can open will work, and square art fits best.
- Optionally type the track title and artist name.
- Check the three previews. On a phone, switch between them with Phone, Player card and Vinyl.
- Press Download phone PNG, Download player card PNG or Download vinyl PNG for the ones you want.
Technical details
Non-square artwork and long titles
Every art slot is square. If your image isn't, the tool crops it from the center to fill the slot instead of stretching it, so the edges of a wide or tall image get cut off; the page says which edges before you download. For a preview that matches your actual release, crop to 1:1 first with the Image Cropper and make sure nothing important sits near the edges. Titles and names that are too long for the layout are shortened with an ellipsis. If you'd rather have the artwork designed for you, see custom cover art.
Sizes
The phone PNG is 720 × 1480 pixels, the player card 1240 × 600 and the vinyl 1120 × 1120, drawn at twice the on-screen size so they stay crisp. The largest art slot is 480 pixels across, so artwork smaller than that is enlarged and looks a little soft. Every PNG carries a small rowen.work mark in the top-right corner.
Want a custom cover instead?
I design cover art from scratch. Send a brief and I’ll reply with a quote and a date.
Cover art orders are closed right now
Join the Discord to hear first when they open.
Audio Visualizer
Turn a song into an animated video that moves with the music.
Paused: showing a sample frame. Press play to see it react to your track.
Export video
WebM with soundSize follows the previewTakes as long as the trackrowen.work watermark, top right
Records in real time from 0:00, with sound. Keep this tab open and in front until it saves; Stop and save ends early and keeps what's recorded.
This browser can't record video from the page, so Export video is off. Try Chrome or Edge.
Style
Image shape
Color
Background Solid
Fine-tune animation Sensitivity, speed, trail
Shape and effects 4 settings
Title and artist overlay Off
Free music visualizer for your tracks
Load a song, watch it react as it plays, then record the result as a video. There are eight styles: Bars, Mirror Bars, Waveform, Spectrum, Circular, Rings, Particles and Starburst. Color can be solid, gradient, rainbow or reactive, the background can be a solid color, a gradient or your cover image blurred behind the motion, and you can add a title and artist overlay. Playback, rendering and recording all happen in your browser.
How to use this tool
How to make a visualizer video
- Choose an audio file and press play to preview it.
- Pick a style, an image shape (Landscape, Square or Vertical) and a color.
- Open Background, Fine-tune animation, Shape and effects or Title and artist overlay for the finer settings.
- Press Export video. The track restarts from 0:00 and records to the end, or press Stop and save to end early and keep what's recorded.
Technical details
What to expect from the export
Recording happens in real time, so a three-minute song takes three minutes to capture, and you'll hear it play while it records. The picture is captured from the preview at 30 frames per second and about 6 Mbps, with the track's audio at 128 kbps. The file is WebM in most browsers, or MP4 where that's the only video format the browser can record; the page names the one you'll get next to the button. The video's pixel size follows how large the preview is on your screen, so a bigger window gives a higher-resolution file, and the exact size is shown before you start. Keep the tab in front while it records: browsers pause drawing in background tabs, and the video would freeze. Every export carries a rowen.work watermark. If Export video is greyed out, your browser can't record canvas video, so try Chrome or Edge.
Animation speed works by changing how much the sound analysis is smoothed between frames: slower settings smooth more, so the motion flows but trails the beat slightly. Beat flash and Reactive color follow the low end of the track, so they respond most to kicks and bass.
Need a beat to visualize?
Browse original instrumentals.
Waveform Image
Turn a song into a PNG or SVG picture of its waveform for cover art, posters or posts.
Download
PNG3200 × 1800 pxrowen.work watermark, top right
Style
Image shape
Color
Rainbow sweeps through every hue, so there's no color to pick.
Background Solid
Blurred and darkened behind the waveform. PNG only; an SVG uses the solid color.
The checkerboard marks the see-through area. It isn't saved in the file.
Fine-tune shape 4 settings
Title and artist text Off
Waveform generator: turn audio into a PNG or SVG
This waveform generator draws the shape of an entire song as a still image for cover art, posters or social posts. Load an MP3, WAV, M4A or any other audio file your browser can decode, style the waveform, and download it as a PNG or an SVG. The audio is analyzed on your device.
How to use this tool
How to make a waveform image
- Choose an audio file. The whole song is drawn, from start to end.
- Pick a style (Bars, Mirror bars, Line, Filled, Blocks or Dots), an image shape (Landscape, Square, Vertical or Banner) and a color.
- Open Background, Fine-tune shape or Title and artist text for the finer settings.
- Under Download, pick PNG (at 1×, 2× or 3×) or SVG, then press Download PNG or Download SVG.
Technical details
PNG or SVG: sizes and limits
Exports are 1600 pixels wide at 1×, so a 3× PNG is 4800 pixels wide. SVG keeps every bar, line and dot as a vector shape, which stays sharp at any size and can be recolored in a vector editor. A Transparent background works in both formats. The Cover image background only renders in PNG; an SVG export uses your solid background color in its place. Title and artist text in an SVG names its fonts rather than embedding them, so it can show in a fallback typeface on a computer that doesn't have them. Both formats include a rowen.work watermark.
Corner roundness, the line width in the Line style and the largest dot size are set in pixels of the finished image, so at 2× and 3× they look finer than in the preview. Everything else scales with the image.
Need a beat to visualize?
Browse original instrumentals.
Lyric Graphic
Turn a lyric or quote into an image sized for posts and stories.
Download
PNG3200 × 3200 pxrowen.work watermark, top right
Type a lyric above to download.
Template
Each line you type is one lyric line; the middle one is highlighted.
Image shape
Text style Display · 100% · Solid
This template always uses its app's typeface.
This template uses white lyrics, like the app.
Position and alignment Center · Center
This template uses the app's own layout.
Background Solid
Blurred and darkened behind the text. PNG only; an SVG uses the solid color.
The checkerboard marks the see-through area. It isn't saved in the file.
Credit line Off
This template has no credit line; use Song title and Artist instead.
Lyric card maker for posts and stories
Type a lyric or quote and this turns it into a typography graphic sized for social media. The text scales itself to fill the frame, and you can choose Square, Post (4:5), Story (9:16) or Landscape. Templates range from plain text, oversized quote marks, a card behind the words, a bold weight and an underline, to layouts modeled on the Spotify and Apple Music lyrics screens. Graphics download as PNG or SVG with a rowen.work watermark.
How to use this tool
How to make a lyric graphic
- Type or paste the line into Lyric or quote. Line breaks you add are kept.
- Pick a template and an image shape.
- Open Text style, Position and alignment, Background or Credit line to fine-tune it. Show credit adds a line such as the song title and artist.
- Pick PNG at 1×, 2× or 3×, or SVG, then press Download PNG or Download SVG.
Technical details
The Spotify and Apple Music templates
These two swap the normal layout for a recreation of an app's lyrics view. Each line you type becomes a lyric line, the middle line is highlighted as the one playing, and a mini player shows the Song title and Artist you enter. If you upload a Cover image background, it also fills the album thumbnail. The icons are simple drawn shapes, not the apps' real logos. The templates always use their app's typeface; the Spotify Mix and SF Pro options under Font let you use those typefaces with the other templates. For these templates the PNG export is the safer choice, because the SVG version names its fonts instead of embedding them and the text can change typeface on another computer.
Sizes, fonts and backgrounds
Every image shape saves 1600 pixels wide at 1×, 3200 at 2× and 4800 at 3×; the height follows the shape. The text scales itself to the largest size that fits the frame at 100%. A Transparent background stays see-through in both PNG and SVG. A Cover image background is only kept in PNG; an SVG uses the solid background color in its place. Every download carries a rowen.work watermark.
Need cover art to go with it?
I design cover art from scratch. Send a brief and I’ll reply with a quote and a date.
Cover art orders are closed right now
Join the Discord to hear first when they open.
Audio Trimmer
Cut the part you want out of a song or recording and download it as a new file.
Drag across the waveform to select, then fine-tune with the handles.
Fade in and out Off
Volume Unchanged
Download
File type and name WAV
Free online audio trimmer
Cut a clip out of a song, voice note or sample without installing an editor. Drag out the section you want on the waveform and export it as a 16-bit WAV or a smaller WebM file, with optional fades, gain and peak normalization. It opens MP3, WAV, M4A and other formats your browser can decode, and everything runs in your browser.
How to use this tool
- Choose an audio file. The whole track starts out selected.
- Drag across the waveform to select a section, drag the handles to fine-tune it, or type exact Start and End times.
- Press Preview selection to hear the clip on a loop, with any fades and volume changes applied.
- If you need them, open Fade in and out (up to 5 seconds each) or Volume (gain of ±12 dB and Normalize peak).
- Press Download WAV. To save a WebM or change the name first, open File type and name.
Technical details
WAV is written straight from the edited audio as 16-bit PCM at the file's own sample rate and channel count, and downloads as soon as it's rendered, so pick it for anything going back into a DAW. WebM is compressed, which makes it much smaller, but the browser has to play the clip through to record it, so the export takes as long as the clip. You can stop a WebM recording partway; nothing is downloaded if you do.
The preview plays the same render the download saves, so fades, gain and normalization are audible before you export. Play full track plays the original file, which is handy for finding the part you want. If you need an MP3, trim to WAV here and then run it through the File Converter.
Need a beat to trim?
Browse original instrumentals.
MP3 Tag Editor
Change an MP3’s title, artist, album and cover art without re-encoding the audio.
More track details Album artist, year, genre, BPM and more
Download
MP3 tag editor with cover art
This MP3 tag editor reads the ID3 tags already on a file and lets you change them before you send the track out. You can edit the title, artist, album, album artist, genre, year, composer, track and disc numbers, BPM and a comment, and add, replace or remove the embedded cover art. The download is the same audio with a fresh ID3v2.4 tag, and nothing leaves your browser.
How to use this tool
- Choose an MP3. Existing tags and artwork fill the form automatically.
- Edit the title, artist and album. Open More track details for album artist, year, genre, composer, track and disc numbers, BPM and a comment. Genre offers the standard ID3 genre list, or Custom… for your own.
- Press Add cover (or Replace cover) to set artwork, or Remove cover to clear it. Detect BPM fills in the tempo from the audio.
- Set the file name and press Download MP3. Revert to original tags puts the form back to what the file had.
Technical details
The editor removes any old ID3v2 tag at the start of the file and any ID3v1 tag at the end, then writes one new tag, so players don't find two conflicting sets of details. The audio itself isn't re-encoded. Only the fields on this form are written, so tags it doesn't show, such as embedded lyrics or an ISRC, won't carry over, and empty fields are left out. When a file has tags like that, the Download section lists them before you download. Uploaded cover images are saved as JPEG and scaled so the longest side is no more than 1000 pixels; a cover that was already in the file is kept as it is. Text is stored as UTF-8, so accented and non-Latin names come through.
The editor works with MP3 files only. It reads ID3v2.3 and ID3v2.4 tags, and fills the form from an older ID3v1 tag when that's all a file has. Tags in the rare ID3v2.2 format, or with an extended header, can't be read; the Download section says so, and saving replaces them.
Need a beat to tag?
Browse original instrumentals.
Audio Merger
Join two or more audio files, in any order, into one track.
Clips, in play order
Drag to reorderAdd at least one more clip to merge. Use Add clips at the top.
Joins between clips
Output level Normalized
Download
File type and name WAV
Audio merger: join tracks into one file
Combine two or more audio files into a single track in your browser. Add your clips, put them in order, and join them back to back, with a gap of silence or with a crossfade. Each clip has its own gain, fade in, fade out and mute, and the finished mix exports as a 16-bit WAV or a WebM file. It accepts MP3, WAV, M4A, OGG and FLAC.
How to use this tool
- Choose audio files. You can select several at once and add more later with Add clips.
- Drag the grip on a clip to reorder it, or focus the grip and press the up and down arrow keys. Press Edit on a clip to set its gain, fade in, fade out or mute.
- Pick how clips join: No gap, Silence gap (up to 5 seconds) or Crossfade (0.1 to 3 seconds).
- Press play to hear the mix. Normalize peak is on by default; open Output level to turn it off and set Master volume yourself.
- Press Download WAV. To save a WebM or change the name first, open File type and name.
Technical details
In Crossfade mode each clip starts before the previous one ends, overlapping by the length you set, and the two ends fade out and in across the overlap. A crossfade can't be longer than either clip it joins. A muted clip keeps its place and length in the mix, so it plays as silence.
Normalize peak is on by default: after mixing, it scales the whole file so the loudest moment lands just under full scale, which also stops an overlap from clipping. Because it sets the final level, Master volume only appears when Normalize peak is off. The mix is rendered at the highest sample rate among the clips, with as many channels as the widest clip, and the WAV is 16-bit PCM. The preview plays the same render the WAV export saves. WebM export plays the mix through in real time to record it, so it takes as long as the track; you can stop it partway, and nothing is downloaded if you do.
Need custom production?
Browse the beats, or ask about custom work on Discord.
File Converter
Convert video, audio, images, documents, spreadsheets, archives, fonts and subtitles. Your files never leave your device.
Select your files to convert
or drop them anywhere on this page
Nothing is uploaded. Some formats download a free engine the first time (up to 32 MB).
Files
One page per picture, in list order, with the first picture’s Quality and Page size. Transparent areas turn white.
Convert to
Settings
Format catalog
Pick a format to see what it can become.
The conversions run in your browser with open-source software, each downloaded only when a file needs it: LAME via lamejs for MP3 (LGPL), FFmpeg via ffmpeg.wasm for audio and video (GPL), ImageMagick with libheif and LibRaw for images (Apache 2.0 and LGPL), pdf.js for PDFs (Apache 2.0), 7-Zip for 7Z and RAR (LGPL, with the unRAR restriction), SheetJS for spreadsheets (Apache 2.0), Mammoth for Word files (BSD), js-yaml (MIT) and Google’s woff2 (MIT).
Free file converter for video, audio, images, documents and more
Convert MP4 to MP3 or WAV, MOV and MKV to MP4, video to GIF, WAV to MP3 or FLAC, HEIC to JPG, PNG to WebP or AVIF, camera RAW to JPG, PDF to Word or JPG, Word to PDF, Excel to CSV, CSV to Excel, JSON to YAML, RAR or 7Z to ZIP, TTF to WOFF2 and SRT to VTT, among hundreds of other pairs. Nothing is uploaded: every file is converted on your own device.
How to use this tool
- Choose files or drag them onto the page. If you pick From and To at the top first, new files start on that conversion.
- On each file’s row, press the format under Convert to and choose what that file becomes. The gear opens that file’s settings (quality, bitrate, trimming, video size and so on), with a button to use them for the other files too.
- Press Convert. Files convert one at a time; each gets a Download button, and Download all (ZIP) appears once two or more are done. With two or more pictures in the list, Combine pictures into one PDF makes a single PDF instead.
What it can’t convert, and why
- Office files that look exactly like Office. Word and PDF files written here keep the text, headings, lists, tables, links and pictures, laid out by this page, not by Word. Fonts, columns, headers and footers aren’t copied.
- PDF to Word with the layout. A PDF becomes editable text and paragraphs, with headings where the text is larger. A scanned PDF has no text at all, so it can only become pictures.
- Slides, Pages, Numbers and old .doc files. Export them as PDF, DOCX or XLSX from the app that made them first.
- Copy-protected music, and MIDI. Protected Apple Music tracks can’t be decoded by anything but Apple’s apps, and a .mid holds notes, not sound.
- Very large files. A browser tab can hold roughly 2 GB, and a long 4K video needs more than that to convert.
- Desktop speed. Video is converted by your own processor on one core, so it’s slower than a desktop app. When the new format can hold the original video as it is, “Best” copies it instead, which takes seconds.
Technical details
What downloads, and when. Your browser already decodes common audio and images, so a WAV to MP3 or a PNG to JPEG downloads nothing. Other conversions need an engine, downloaded the first time a file needs it and then kept by your browser: the media engine (FFmpeg, 32 MB) for video and for audio formats like FLAC, M4A, OGG and WMA; the image engine (ImageMagick, 15 MB) for HEIC, TIFF, PSD, camera RAW, AVIF and GIF output; the PDF reader (about 2 MB); the archive engine (7-Zip, about 2 MB) for 7Z and RAR; and a font engine (about 1 MB) for WOFF2. Your files are still never sent anywhere.
Video. MP4, MOV, MKV and FLV are written as H.264 with AAC sound, WebM as VP8 with Opus, AVI as MPEG-4 with MP3, WMV as Windows Media, MPG as MPEG-2 and OGV as Theora. With Video quality on Best, a stream the new format can hold is copied untouched: an MKV of H.264 becomes an MP4 in seconds and loses nothing. Trimming or resizing always re-encodes.
Sample rates. The browser’s audio engine resamples to your sound card’s rate unless told otherwise, so the file’s own rate is read from its header first and kept: a 44.1 kHz track stays 44.1 kHz. MP3, WMA and AC3 can’t store more than 48 kHz, and Opus always plays at 48 kHz.
Pictures. Photos are turned the right way up from their EXIF data. Camera RAW is developed with the white balance the camera recorded. A PSD is converted from its flattened picture, so layers aren’t kept. JPEG and BMP can’t hold transparency, so transparent areas get the fill colour from the file’s settings.
Documents. Every document is read into headings, paragraphs, lists, tables and pictures, and every output is written from that, which is why any document can become any other. PDFs are written with the standard PDF fonts, which cover Western European languages; other characters show as a question mark.
One file at a time. Convert works down the list in order, on purpose: decoding several large files at once is how a phone runs out of memory halfway through. Stop after this file ends the batch between files, and Cancel on a row stops an engine mid-file.
DAW Project Tools
See what’s inside an Ableton, FL Studio, REAPER, LMMS or MIDI file and use the tools its format supports, on your device.
What each format can do here
- Ableton Live .als Read it, save it for Live 11 or 10, export its MIDI.
- FL Studio .flp Read it, check it for damage, save it for FL 24, 21, 20 or 12, export its MIDI.
- REAPER .rpp Read it, fix its sample paths, export its MIDI.
- LMMS .mmpz .mmp Read it, unpack .mmpz to .mmp, export its MIDI.
- MIDI .mid Read it, switch it between type 0 and type 1.
Nothing here turns a project from one DAW into another; MIDI export carries the notes across. Logic Pro, Cubase and Studio One projects can’t be read: export MIDI from them and drop in the .mid.
Project
What you can do with it
To move a song to another DAW, export its MIDI for the notes and bounce the audio in the original app.
Inside the project
Tracks
Plugins and devices
Sample paths
DAW project tools: read, downgrade and export MIDI from project files
Drop in an Ableton Live set (.als), FL Studio project (.flp), REAPER project (.rpp), LMMS project (.mmpz or .mmp) or a MIDI file to see which version saved it, its tempo, time signature, key, tracks, and every plugin and sample path it uses. Then save the set for Live 11 or 10 or the project for an older FL Studio, fix REAPER sample paths, unpack an LMMS project, export the notes as MIDI, or switch a MIDI file between type 0 and type 1. It doesn’t convert a project from one DAW to another. It’s free, there’s no sign-up, and the file is read in your browser.
How to use this tool
- Choose a project file, or drag it onto the box.
- Check the summary, then the plugin and sample lists under Inside the project, to see what the project needs.
- Under What you can do with this project, pick the version or option you want. Only the tools that work for that format appear, and the (?) beside each one says what it does.
- Press the download button. The new file is named after yours, like mysong (Live 11).als, and your original is never changed.
Technical details
What “save for an older version” really does. For Ableton and FL Studio, it rewrites the version stamp the project carries so the older app agrees to open it. It doesn’t translate anything else. Devices, plugins and features the older version doesn’t have are dropped or show as missing when it loads, so keep your original and check the result. A damaged FL Studio project isn’t re-saved, because rewriting it would hide the damage.
What MIDI export carries. Notes, their timing and velocity, track names and one tempo: the project’s starting tempo, used throughout. Audio, plugins, automation and mixer settings stay in the project. FL Studio exports one track per pattern with every pattern at bar 1, because the playlist isn’t read; LMMS leaves out Beat/Bassline steps.
Key. It’s read from the file when a Live 12 set or a MIDI key signature stores one; otherwise it’s estimated from the notes and labelled that way. Logic Pro, Cubase and Studio One projects use closed formats, so they can’t be read here.
MIDI Editor
Edit the notes of a MIDI file, or a blank pattern, in a piano roll and download the result as MIDI.
Start a blank pattern
Mouse, touch and keyboard
- Draw adds a note where you click. Select only selects: click notes or drag a box around them.
- Shift-click (or Ctrl/Cmd-click) adds notes to the selection. Dragging empty grid with a mouse draws a selection box.
- Double-click or right-click a note to delete it. Hold Alt while dragging to move or resize off the snap grid.
- Click the ruler to move the playhead. Paste lands there. Drag across the ruler to set the loop and turn it on.
- Click the keyboard on the left to hear a note. Ctrl/Cmd + scroll wheel zooms.
- Drag across the velocity lane under the roll to set how hard each note plays.
- On a touchscreen, drag empty space to scroll, or use two fingers anywhere.
- Keys: Space plays or stops, Delete removes selected notes, Esc clears the selection, Ctrl/Cmd+Z undoes, Ctrl/Cmd+Y or Shift+Z redoes, Ctrl/Cmd+C, V, D and A copy, paste, duplicate and select all.
Change notes
Nothing selected, so these change every note in this track.
Track settings
Download
MIDI every track, muted ones tooWAV a sketch from the built-in preview synth, not your plugins: 16-bit, 44.1 kHz, muted tracks left out
Free online MIDI editor, sequencer and player
Open a .mid or .midi file, or start from blank bars, and edit it in a piano roll: add, move and resize notes, change velocities, quantize, transpose and humanize, then download it as MIDI or as a WAV preview. The file is read and written in your browser and never uploaded.
How to use this tool
- Open a MIDI file, or choose a tempo, time signature and number of bars and press Start blank pattern.
- Pick a track above the piano roll. Other tracks show faintly behind it.
- Click the grid to add notes at the snap length, drag them to move, and drag their right edge to resize. Shift-click or drag a box to select several.
- Use the velocity lane and Change notes to shape them, and press Play to hear them.
- Press Download MIDI to take the file into your DAW, or Download WAV preview for an audio sketch.
Technical details
Playback uses a small synth made in the browser: piano, electric keys, pluck, bass, pad and a basic drum kit for channel 10. It's there so you can check timing and notes, not to sound like your plugins, so load the downloaded MIDI into your DAW for the real sound. The editor keeps notes, the tempo map, the opening time signature, track names and instruments. Controller data such as sustain pedal, pitch bend and mod wheel is not shown and is left out of the saved file; when a file you open has any, the page lists it next to Download MIDI. Files timed in SMPTE timecode instead of ticks can't be opened; re-export them with standard timing.
Mix Check
Check a finished bounce before release: loudness, peaks, tonal balance, stereo and mono, and what to listen for first.
Decoding
What to check first
Checks that passed
Technical scoreHow the numbers add up
Listen on other speakers
Compare with a reference
| Measurement | Your mix | Reference |
|---|
Measurements
Loudness and peaks LUFS, range, true peak, dynamics
Streaming services What each one does to it
| Service | Target | Playback change |
|---|
These are the published default normalisation targets as of 2026. Services change them, and listeners can turn normalisation off.
File details Sample rate, DC offset, clipping, silence
TXT plain textLoudness, peaks, streaming changes, findings and tonal bands
Loudness over time
View as table
| 3 s ending at | Short-term |
|---|
Tonal balance
View as table
| Frequency | Your mix (dB) | Guide (dB) | Reference (dB) |
|---|
Bands against the guide
Stereo and mono
This is a mono file, so there's no stereo image to measure.
View as table
| Time | Correlation |
|---|
| Band | Correlation | Mono sum |
|---|
Mix check: LUFS meter, true peak, tonal balance and mono check
Drop in a bounce and get the numbers streaming services and mastering engineers look at: integrated, short-term and momentary loudness and loudness range to ITU-R BS.1770-4 and EBU R128, true peak with 4× oversampling, tonal balance, stereo correlation, width and mono compatibility. Nothing is uploaded; the analysis runs in your browser.
How to use this tool
- Choose a WAV or FLAC bounce of the finished track.
- Read What to check first: each Problem or Check says what was measured and what to listen for.
- Look at Tonal balance against the guide closest to your genre, and at Stereo and mono for bands that cancel.
- Press Play and switch between Phone, Laptop, Car and the other speakers, with Mono on and off.
- Optionally add a released song you like under Compare with a reference and switch between them at matched loudness.
Technical details
Loudness uses the standard K-weighting filter calculated for your file's own sample rate, 400 ms gating blocks and the -70 LUFS and -10 LU gates, and it reads the EBU Tech 3341 sine test signals it was checked against within 0.1 LU. The streaming table uses each service's published default target: -14 LUFS for Spotify, YouTube and Tidal, -16 for Apple Music. The tonal guides are hand-shaped curves, not averages of chart hits, so treat a difference as a prompt to listen rather than a fault. The technical score out of 100 adds up those measurements (20 points for streaming loudness, 15 each for true-peak headroom, dynamics, tonal balance and mono, 10 for clipping, 5 each for DC offset and loudness range) and shows every part. A quiet, dynamic or genre-specific master can score lower and still be right, and no number can say a mix sounds good. The time to full energy is a measurement of when the track gets loud, not a prediction of skips or plays.
Audio File Info
See what's inside an audio file: format, length, sample rate, bit depth, bitrate, tags and cover art.
Summary
Notes about this file
Audio
Lossy history check
Tags and artwork
Embedded pictures
To change the tags or cover, use the MP3 Tag Editor.
Technical details
Copies the summary, tags, details and notes as plain textRead from the file's own headers; nothing is uploaded
Check an audio file's bitrate, sample rate, bit depth and tags
Read an audio file's headers and see the container and codec, sample rate, channels, bit depth, bitrate (constant or variable), length, encoder, every tag and any embedded cover art. It runs in your browser, so the file never leaves your device.
How to use this tool
- Choose or drop an MP3, WAV, FLAC, OGG, Opus, AIFF or M4A file.
- Read the summary at the top: format, length, file size, sample rate and channels. Codec, bit depth, bitrate and encoder are under Audio.
- For WAV, FLAC and AIFF, check the result under Lossy history check.
- Scroll down for tags, cover art and technical details, or press Copy details to paste them somewhere else.
Technical details
For MP3 the tool tells constant from variable bitrate by reading the Xing, Info or VBRI header, and works out the average by scanning the frames. It reads tags from ID3v1 and all three ID3v2 versions, RIFF INFO, broadcast WAV, FLAC and Ogg comments, AIFF text chunks and M4A metadata.
The lossy history check: MP3 and AAC encoders cut off the highest frequencies to save space: around 16 kHz at 128 kbps, and 19 to 20 kHz at 256 to 320 kbps. Converting that MP3 back to WAV or FLAC doesn't bring those frequencies back, so the file keeps a flat shelf where the top end should be. The check averages the spectrum across the file and looks for that shelf. A shelf is a strong hint that the file had a lossy past. It can't prove it, though: a dark mix, a synth with a low-pass filter or a mastering filter can cut the highs in the same way, and a file with a full spectrum could still have been through a high-bitrate encoder. For MP3, OGG and AAC files there's nothing to check, since those formats are lossy by design.
Audio Effects
Reverse, loop, speed up, distort or fade a sound, hear it next to the original, then save it as WAV or MP3.
With effects
No effects on yet.
Trim, reverse and loop
Speed
Distortion and bitcrush Off
Volume
Fades Off
Export settings
Encoded with LAME. A sample rate MP3 can't store, such as 96 kHz, is converted to the nearest one it can.
-
Reverse, loop, speed up, distort or bitcrush audio online
Load a WAV, MP3, FLAC, OGG or other audio file and stack effects on it: trim the silence, reverse it, loop it with a crossfade at the seam, change the speed and pitch together like a tape machine, add distortion or bitcrushing, set the volume and fade the ends, then save it as a WAV at the original sample rate or an MP3 from 128 to 320 kbps (a lower-bitrate MP3 is also a quick way to compress a file). Everything runs in your browser, so nothing is uploaded.
How to use this tool
- Choose an audio file up to 10 minutes long.
- Switch on the effects you want and adjust them; Distortion and bitcrush and Fades open with a click. Press Play to listen while you work, and switch to Original to compare.
- Check Peak after effects. If it says the result clips, lower the gain or switch on Stop clipping.
- Pick WAV or MP3 under Export settings, check the line under the button, then press Download WAV or Download MP3.
Technical details
Trim, reverse, loop and bitcrush happen first, on the audio itself. Speed, distortion, volume and fades come after, in that order, so fade times are measured on the finished result and a sped-up loop keeps its crossfade. Speed works like a record played faster or slower, so pitch moves with it; this tool doesn't change tempo and pitch separately. Stop clipping turns the whole result down just enough that the loudest peak lands at −1 dB, rather than compressing the loud parts, so the sound stays the same apart from the level. If you only need to cut a section out, the Audio Trimmer is quicker, and Normalize Audio matches a target level.
YouTube Thumbnail Previewer
See your thumbnail and title in a YouTube-style feed before you publish.
Your video
Channel, views, age and length Optional · the small text under your title
Feed
Videos around yours
Trending and Search load public videos from YouTube around yours. Your thumbnail and title stay on your device; a search sends only the words you search for.
Privacy details
Trending sends the country and category, and a search sends your search words and the country, to this site's server. It asks the YouTube Data API and keeps the answer for up to 3 hours (Trending) or 12 hours (Search), so repeat requests don't use up the daily quota.
Real thumbnails and channel pictures load straight from YouTube's image servers (i.ytimg.com and yt3.ggpht.com). Your own thumbnails, title, channel picture and added images never leave your device.
To stop one visitor using up the quota, requests are counted with a salted hash of your IP address that expires within about an hour. The address itself isn't stored.
Removes your versions, channel picture and added images.
Preview a YouTube thumbnail in the feed before you upload
A thumbnail that looks good full screen in Photoshop can disappear at 168 pixels wide next to eleven other videos. This previewer drops yours into four layouts drawn at their real sizes: a desktop home feed with three or four columns, search results, the Up next list beside a video, and a phone feed. Switch between light and dark mode, check where the title gets cut, and swap between up to three versions of the thumbnail to see which one you notice first. It shows how a thumbnail looks next to others, not how many people will click it.
How to use this tool
How to preview your thumbnail
- Choose your thumbnail, or up to three versions of it.
- Type the title and read the Title cut-off line. Channel, views, age and length are optional.
- Pick a layout and a theme, and choose which videos sit around yours.
- Press Shuffle position a few times and see how quickly you find yours.
Technical details
What's real and what isn't
The layouts copy the proportions of a video feed, not YouTube's exact styling. Trending and Search fill the feed with real public videos from YouTube, and pressing a category chip or searching inside the feed changes them. When those aren't available, or you pick Placeholders, the videos around yours are generic tiles with made-up titles; My images uses thumbnails you've saved from channels in your niche, which stay on your device. The title cut-off is measured in the font and width on screen, so it can differ by a few characters from what a viewer's device shows.
This tool can't tell you which version will get more clicks. Only real viewers can: YouTube Studio's Test & compare shows up to three thumbnails to real viewers and reports which one got more watch time.
Need one made for you? Get a custom thumbnail. Not affiliated with YouTube.
YouTube Thumbnail Rater
Get a design score out of 100 with detailed feedback, plus upload checks and real-size previews.
Video details
Thumbnail score AI design review
The AI design review isn’t set up on this site yet: it needs an AI provider key on the server. The local checks below work without it.
Scores composition, subject, readability, colour, hook, typography and craft out of 100. The image alone is enough.
Add more context title, topic, audience
Sends this thumbnail and any context you add to an AI service.
Privacy details
Nothing is sent until you press Rate thumbnail.
Local checks measured in your browser; nothing is sent
Custom Shorts thumbnails can only be added in YouTube Studio on a computer.
Upload limits and recommendations
From YouTube Help, “Add custom thumbnails on YouTube”, last checked 27 September 2026.
Suggestions
At real size
Check text and the main subject optional
Find text automatically
Downloads a free text reader once (about 6–9 MB, from jsDelivr); your image stays on your device.
With a box selected on the picture: arrow keys move it, Shift + arrows resize it, Delete removes it.
Detailed analysis and technical grade
Measured: a fact about the file, or the size and position of a box. Likely and Possible: estimates from the pixels, which can be wrong, most often on deliberate styles. None of it knows what the picture shows.
Start over clears every thumbnail you’ve added and every box. Nothing is uploaded; the checks run in your browser.
Side by side
Measurements for each version. No winner is picked: the numbers can’t judge which idea is better, so compare the previews too.
Rate a YouTube thumbnail before you upload it
Get a design score out of 100 with feedback on composition, readability, colour and hook, check the file against YouTube’s upload limits, and see the thumbnail at the sizes feeds really use.
How to use this tool
- Choose a thumbnail. Optionally open Add more context and type the video’s title, what it’s about and who it’s for.
- Press Rate thumbnail for the score and design feedback. Open any category for the full report.
- Under Local checks, pick what it’s for and where you’ll upload it from, and fix anything the upload box says YouTube won’t take. A tool link next to each problem opens a copy of the image there.
- Look at the real-size previews. Optionally box the text and the main subject for size and contrast checks. Add up to two more versions to compare them side by side.
Technical details
The thumbnail score is an AI-assisted design assessment, not a prediction of views or clicks. When you press Rate thumbnail, a vision model reviews the image against a fixed rubric: composition and visual hierarchy (20 points), main subject clarity and separation (15), small-screen readability (15), colour, contrast and lighting (15), visual hook and storytelling (15), typography and text integration (10), and craft and image quality (10). These are design-rubric weights, not a statistically validated model. The model rates each category from 0 to 10 against written anchors; the points and the total are calculated by this page, a category that doesn’t apply (no text, for example) is left out and the rest scaled to 100, and measured small-size contrast caps the readability rating. It only sends the image you’re viewing and the text you typed, and only when you press the button.
The local checks do three jobs. First it compares the file with YouTube’s own help page for the thing you’re uploading (a video, a Short or a podcast playlist) and the device you upload from, and keeps limits that stop an upload apart from recommendations that don’t. Then it measures how the picture holds up small, and turns anything notable into at most three suggestions, each saying what it saw, where, why it might matter and what to try. Last, it shows the thumbnail at the sizes feeds really use, blurred like a scroll past, and in greyscale.
What’s measured, what’s estimated, and what isn’t checked
Measured exactly: resolution, shape, file size and file type against YouTube’s page, and the size and position of any box you draw or the text finder adds, at each preview width. Estimated from the pixels: contrast that survives at 168 px wide, sharpness (measured on edges only, after removing grain, so noise and oversharpening can’t raise it), roughly how much real detail an upscaled image holds, grain, clutter, detail under the duration badge, and text contrast when the box holds two clear tones. These are labelled Likely or Possible and can be wrong, most often on deliberate styles. Not checked by the local checks: faces, what the picture shows, whether it fits the title, or whether anyone will click; the AI review judges the design side of those, and nothing here predicts clicks. Dark, bright, black-and-white, minimal and textured designs aren’t marked down for being so, and a thumbnail with no text or no face isn’t either.
How the local technical grade works
The grade out of 100 adds up fixed parts, all shown under Detailed analysis: 20 for fitting the chosen target’s limits and recommendations, 35 for contrast measured on a 168 px copy (where grain averages out), 20 for crisp edges at full size, 15 for a clear duration-badge corner (videos only; a box you draw under the badge counts too), and 10 for how busy the tile is at 168 px. Colour and saturation aren’t scored. Heavy grain lowers the sharpness part, because it can’t be measured through the grain; grain never adds points. It isn’t a click, creativity or CTR prediction.
Sharpness uses a no-reference blur measure (Crété-Roffet and others, 2007) on edge pixels after a median filter, and grain is estimated with Immerkær’s method (1996). The detail estimate repeats the blur measure on smaller copies: an upscaled picture only turns sharp near the size it came from. Expect it to be off by up to about half a step. Colourfulness is Hasler and Süsstrunk’s metric (2003). Text contrast is the WCAG contrast ratio between the two tones Otsu’s method finds in the box, and 3:1 is used as a reference point for large text. The 9 px text height and the 5% margin are rules of thumb, and the badge, progress bar and margin on the previews are approximations of YouTube’s current feed, not a specification. GIFs are checked on their first frame.
YouTube’s limits
The limits follow YouTube Help’s “Add custom thumbnails on YouTube” page as read on 27 September 2026: for videos, 3840 × 2160 recommended with a minimum width of 640; for Shorts, 2160 × 3840 with a minimum height of 640; “image formats such as JPG or PNG”; 16:9 for videos, 9:16 for Shorts and 1:1 for podcast playlists; and a size limit of 2 MB (videos) or 10 MB (podcasts) from a phone and 50 MB from a computer. Custom Shorts thumbnails can only be added in YouTube Studio on a computer, and custom thumbnails need a verified account.
Need one made for you? Get a custom thumbnail. Not affiliated with YouTube.
YouTube Thumbnail Downloader
Paste a YouTube link to download its thumbnail at the largest size available.
Other sizes
Your browser blocked the direct download, so the image opened in a new tab. Right-click it and choose Save image as (on a phone, press and hold).
Download a YouTube thumbnail in every size
Every public YouTube video has its thumbnail stored at up to five sizes on YouTube's image server: max resolution (1280 × 720), standard (640 × 480), high (480 × 360), medium (320 × 180) and small (120 × 90). Paste any link to the video and this tool finds the video ID and shows each size that exists, with a download button for each. It's handy when you've lost the original file of your own thumbnail, or want a reference image for a redesign.
How to use this tool
How to download a thumbnail
- Copy the video's link from the address bar or the Share button.
- Paste it in and press Get thumbnail.
- Press Download JPG for the largest size, or open Other sizes for the smaller ones.
Technical details
Why a size can be missing
YouTube only makes the max resolution and standard sizes when the uploaded thumbnail or video was big enough. When a size doesn't exist, YouTube returns a small grey placeholder instead, and this tool hides it rather than offering you a 120 × 90 grey box. The standard and high sizes are 4:3, so they have black bars above and below a 16:9 picture. The images come straight from YouTube's servers to your browser. If your browser blocks the direct download, the image opens in a new tab for you to save. A thumbnail belongs to whoever made it, so don't reupload someone else's as your own.
Need one made for you? Get a custom thumbnail. Not affiliated with YouTube.
YouTube Title Generator
Get YouTube title ideas, type beat titles included, filled in from hand-written templates (not AI).
Beat details Optional · name, BPM, key, producer, [FREE]
Type what the video is about to get titles.
Free YouTube title generator, with type beat titles
Pick the video type, type the topic, and get twenty or more titles built from formulas people use on YouTube: how-tos, lists, reviews, challenges, comparisons and reactions. For producers there's a type beat mode that writes titles the way the type beat scene formats them, like [FREE] Artist Type Beat - "Name", with BPM, key and a producer credit when you add them. Every title shows its character count and a flag once it passes 60 or 70 characters. The first twelve show straight away; Show all lists the rest.
How to use this tool
How to write a title with it
- Pick the video type.
- Type the topic, or the artist for a type beat. Beat details (name, BPM, key, producer, [FREE]) are optional.
- Press Shuffle order to see them in a different order, and copy the ones you like.
- Edit the best one so it says what's actually in the video.
Technical details
Templates, not AI
These titles come from a fixed list of formulas written by hand, filled in with exactly what you typed. That makes them predictable: "How to {topic}" needs a topic like "mix vocals", while "{n} best {topic}" reads better with "studio headphones". If one comes out clumsy, that's the template meeting your wording, so edit it. YouTube allows 100 characters, but search results usually cut titles at around 60 to 70 and phones cut them sooner, so put the important words first. Try the result in the YouTube Thumbnail Previewer to see where it gets cut next to your thumbnail.
Need one made for you? Get a custom thumbnail. Not affiliated with YouTube.
YouTube Description Builder
Arrange what you type into a tidy YouTube description with chapters and hashtags (no AI).
Add sections optional, in this order
Links Store, beat, merch
Timestamps Chapters
Credits Producer, mix, video
Licensing and contact For beats
Social links Instagram, TikTok…
Hashtags Up to three
Before "…more"
Your first lines show here.…more
Write a YouTube description with chapters and hashtags
Paste in what you have (a summary, links, chapter times, credits, licensing terms, socials and hashtags) and this puts them in a sensible order with blank lines between sections. Timestamps are tidied into the "0:00 Title" format YouTube reads as chapters, hashtags go on the last line, and a counter tracks the 5,000-character limit. The preview shows roughly what appears before "…more", which is the part most people read.
How to use this tool
How to build a description
- Write a summary that says what the video is in its first sentence.
- Open the sections you need (links, timestamps, credits, licensing, socials, hashtags) and leave the rest closed.
- Read any warnings under the counter, especially about chapters. Make small changes straight in the finished description if you like.
- Press Copy description and paste it into YouTube Studio.
Technical details
Chapters, hashtags and the 150 characters
YouTube only turns timestamps into chapters when the first one is 0:00, there are at least three, and each chapter lasts at least 10 seconds. This tool warns you when those aren't met rather than inventing a 0:00 line. Only the first three hashtags go in, because those are the ones YouTube shows above the title. The "…more" cut is about 150 characters but moves with screen size, so treat the preview as a guide. Nothing here is written for you by AI; it only arranges what you typed.
Once you edit the finished description, it stops following the fields, so nothing you type in them overwrites your changes. Rebuild from the fields replaces your version with what the fields make now, and Bring back my edits restores it until you edit again.
Need one made for you? Get a custom thumbnail. Not affiliated with YouTube.
YouTube Tags Generator
Turn a topic and a few keywords into a YouTube tag list that fits the 500-character limit, built with fixed rules (no AI, no search data).
Type a topic to get tags.
Included
Don't fit
Over the 500-character limit, so Copy leaves these out. Remove a tag above and the next one moves up.
Generate YouTube tags that fit the 500-character limit
Type the main topic and a few keywords and this builds a tag list from them: your exact phrases first, then the single words inside them, then longer versions ("how to …", "… for beginners"), then the spellings people type differently, like hip hop, hiphop and hip-hop. Turn on type beat tags and each artist gets "artist type beat", the year version, the "free" version and "artist instrumental". Duplicates are removed however they're capitalised. Tags play a small part in how YouTube finds videos; the title, thumbnail and description do more.
How to use this tool
How to make a tag list
- Type the main topic and any keywords.
- For beats, turn on Type beat tags and list the artists.
- Remove any tag that isn't really about your video with its ×.
- Press Copy tags and paste them into the Tags box in YouTube Studio.
Technical details
How much tags matter, and how the count works
YouTube says tags play a small role in discovery and matter most for words people misspell, so the title, thumbnail and description do more work. Tags are still useful for type beats, where people search for the exact phrase. The counter follows YouTube Studio: each tag's characters, a comma between tags, and two extra for any tag with a space in it, because Studio wraps those in quotes. Tags that don't fit are listed separately under Don't fit, and Copy tags copies only the included ones. These tags are made from what you typed with fixed rules; there's no AI and no search-volume data behind them.
Need one made for you? Get a custom thumbnail. Not affiliated with YouTube.
Thumbnail Ideas
Browse hand-written thumbnail ideas for your kind of channel, with the words to put on each one.
Thumbnail ideas for music producers, gamers, vloggers and more
Pick a niche and get a set of thumbnail concepts you can actually build: where things go in the frame, what the text says (never more than four words), which colours to use, what the face is doing, and one tip for keeping it readable at small sizes. The music production and type beat sets are written for producers, including what not to do, like using a photo of an artist you don't have rights to.
How to use this tool
How to use an idea
- Pick your niche and read through the concepts. Open one for its layout, colour, face and contrast notes.
- Choose one that fits what actually happens in your video.
- Make it, then check it at feed size in the YouTube Thumbnail Rater.
- Drop it into the YouTube Thumbnail Previewer next to others from your niche.
Technical details
Why the list is short
Each niche has six or seven ideas, written and checked by hand rather than generated on the spot, so Shuffle order reorders them instead of inventing new ones. They're written descriptions, not pictures: you make the thumbnail yourself. They're starting points, not rules. A thumbnail works when it matches the title and shows something the video delivers, and no list can know what that is for your video.
Need one made for you? Get a custom thumbnail. Not affiliated with YouTube.
Thumbnail Safe Zone
See which parts of your thumbnail the duration badge, the progress bar and YouTube’s buttons cover.
At the sizes people see it
What covers your thumbnail
Layout guides
PNG at your thumbnail’s own size, with the guides drawn on. Handy for sending to a designer.
YouTube thumbnail safe zone checker
Load a thumbnail and this draws what sits on top of it in a YouTube feed: the duration badge in the bottom-right corner, the red bar returning viewers see along the bottom, and the buttons that appear when someone points at it on a computer. Turn on the layout guides to check your margins, the center of the frame and what a square or 4:5 crop keeps. The strip under the preview shows the same thumbnail at 360, 246 and 168 pixels wide, the sizes of search results, a four-column home feed and the Up next list.
What each guide means
Duration badge
Almost every feed puts the video length in the bottom-right corner. A face, a word or a number there gets covered, so keep that corner for background.
Watch-progress bar
Anyone who has watched part of the video sees a red bar along the bottom edge. It’s thin, but text that touches the bottom gets underlined in red.
Hover buttons
On a computer, Watch later and Add to queue appear in the top-right corner while the pointer is over the thumbnail. They only show on hover, so this matters less than the badge.
Edge margin
A 5% margin keeps text off the rounded corners and away from the badge. It’s a guide, not a rule; a big face can break it on purpose.
Square and 4:5 crops
YouTube shows video thumbnails at 16:9, but the same art often ends up as a square or a 4:5 promo post. Anything outside those frames gets cut when that happens.
Center focus
Thirds lines and the middle of the frame, the places the eye lands first. Use them to check that the subject still reads when the thumbnail is 168 pixels wide.
Technical details
How the guides are drawn
The guides are drawn as fractions of the frame, so they fit any 16:9 image. The badge and button sizes approximate how YouTube draws them on a desktop feed today; they aren’t a published spec, and YouTube changes its layout from time to time. The badge rectangle is the same one the YouTube Thumbnail Rater checks against. A thumbnail that isn’t 16:9 is shown the way a feed would frame it, with bars. Your image is read in the browser and never uploaded.
Need one made for you? See custom thumbnails. Not affiliated with YouTube.
Cover Art Previewer
See your cover the way listeners will: on a now-playing screen, in an album grid, a playlist and a tiny phone row.
Your release
The first two open another free tool with this cover already loaded.
Preview your cover art before you release it
Most people meet your cover at a fraction of the size you designed it: a square about 300 pixels wide on a now-playing screen, 160 in an album grid, and 40 to 56 in a playlist or search list. This previewer puts your artwork, title and artist into generic versions of those screens at their real sizes, so you can see whether the idea still reads and whether small text survives. Switch to the light theme, turn on the explicit badge, and compare the grid with the placeholder covers around it.
How to use this tool
How to preview cover art
- Drop your cover onto the box or choose the file.
- Type the title and artist the way they’ll appear on the release.
- Look at Small sizes first: that’s where most covers lose their text.
- Press Check size and file to see whether the file meets common store requirements.
Technical details
Sizes and what’s generic
Every scene is drawn at 1× CSS pixels, so a 48-pixel row is 48 pixels on your screen (on a high-density phone, that’s also how big it looks there). The layouts are generic players, not copies of Spotify, Apple Music or any other app, and the surrounding covers are plain placeholders. A cover that isn’t square is centered and cropped the way most apps do it. Nothing is uploaded.
Want a custom cover instead?
I design cover art from scratch. Send a brief and I’ll reply with a quote and a date.
Cover art orders are closed right now
Join the Discord to hear first when they open.
Cover Art Size Checker
Check your cover’s size, shape and file before you send it to your distributor.
Your file
Against published requirements
Check cover art size before you upload
Distributors send artwork back for a handful of reasons, and most of them are in the file rather than the design: it isn’t square, it’s too small, it’s the wrong file type, it’s in CMYK or it only looks the right way up because of a rotation tag. This checker reads your file in the browser and tells you its dimensions, shape, type, size, colour mode, transparency and colour profile, then compares them with what Spotify and Apple Music publish. 3000 × 3000 pixels, square, JPG or PNG in RGB is commonly accepted by major distributors, and that’s what “Looks good” means here.
What the checks mean
Size
Spotify accepts square art from 640 to 10,000 pixels a side and asks you not to upscale. Apple Music asks for at least 1400 × 1400 and recommends 3000 × 3000 or larger. Most distributors ask for 3000 × 3000, so that’s the size to deliver. Enlarging a small image makes the file bigger, not sharper.
Shape
Both stores want exactly 1:1. A cover that’s a few pixels off square can be refused, so crop it rather than stretch it.
File type, colour and rotation
JPG and PNG are accepted everywhere; Spotify also lists TIFF. Colour should be RGB (Spotify asks for sRGB). A JPG saved in CMYK for print looks wrong on screens and is often refused. Some phones save photos sideways and add a rotation tag; Spotify says it doesn’t read orientation data, so that cover would show sideways.
Transparency
Transparent areas have no colour of their own, so each app fills them differently. Flatten the cover onto a solid background before you export.
Sources
Want a cover that’s ready to upload?
I design cover art from scratch, delivered print and streaming ready.
Cover art orders are closed right now
Join the Discord to hear first when they open.
Delay Calculator
Turn a tempo into delay and reverb times in milliseconds or Hz, for every note value.
20 to 400 BPM. Tap along to a song to set it, or use ↑ and ↓ in the box.
Click a value to copy it.
| Note | Straight | Dotted | Triplet |
|---|
Reverb timed to the tempo
BPM to milliseconds delay calculator
Delays and reverbs sit better in a mix when their timing follows the song. Type a tempo, or tap it, and this lists the length of every note value from a whole note down to a 1/64 in milliseconds, with dotted and triplet versions next to each. Switch to Hz for LFO and tremolo rates, or to samples when a plugin wants a sample count. The reverb section gives a pre-delay and decay that line up with the beat.
How the numbers are worked out
The formula
One beat (a quarter note) lasts 60,000 ÷ BPM milliseconds, so at 120 BPM a quarter note is 500 ms. Each note value halves the one before it. A dotted note is 1.5 times as long, a triplet two thirds as long. Hz is 1000 ÷ milliseconds, and samples are milliseconds × 44.1 or × 48 for the two common sample rates. The pre-delays are a 1/64 and a 1/128 note; the decay is the note value minus the pre-delay, so the tail ends on the grid.
Need a beat to go with it?
Browse original instrumentals.
Note Frequency Chart
The frequency of every note, and the nearest note to any frequency, with how many cents it’s off.
Type a frequency, like the peak of an 808 in a spectrum analyser.
Click a note to hear it. Hold Shift and click to copy its frequency.
Note frequency chart in hertz
Every note from C0 to B8 with its frequency, worked out from A4 at 440 Hz or any reference you set, like 432. Producers use it to tune 808s and sub bass to a song’s key, set a filter on a note, or read a spectrum analyser. Type a frequency to get the nearest note and how many cents sharp or flat it is, and click any note to hear a sine tone at that pitch.
How the numbers are worked out
Equal temperament
Each semitone is the twelfth root of two (about 1.0595) times the one below it, and an octave doubles the frequency. So a note n semitones above A4 is A4 × 2^(n÷12). A cent is a hundredth of a semitone; the nearest-note readout rounds to the closest semitone and shows the difference in cents. MIDI note numbers use middle C as C4 = 60.
Need a beat to go with it?
Browse original instrumentals.
Time Stretch Calculator
Work out a tempo change: the stretch percentage, the new length, and how far the pitch moves if you speed it up without keeping pitch.
Tempos that land on a whole semitone
| Shift | Tempo | Speed | Key |
|---|
Time stretch and tempo change calculator
Changing a track’s tempo can happen two ways. Time stretching (warping in Ableton, stretch in FL Studio) keeps the pitch and only changes the speed. Speeding the file up or slowing it down, the way sped-up and slowed edits do, changes both, like a turntable. Type the original and new tempo and this shows the percentage your DAW needs, how long the track becomes, and how many semitones and cents the pitch moves if you don’t keep pitch, including the key it lands in.
How the numbers are worked out
Ratios and semitones
The speed factor is new BPM ÷ original BPM, and the new length is the old length divided by it. Without pitch correction, the pitch moves 12 × log₂(speed factor) semitones, so doubling the speed is exactly +12, one octave. The in-tune tempos are the original BPM × 2^(n÷12) for whole numbers of semitones.
Need a beat to go with it?
Browse original instrumentals.
Taking thumbnail orders
Roblox thumbnail designer
Thumbnails for Roblox videos, made around your avatar and the game you played. Challenges, obbies, meme games, updates and anything else your channel makes.
- From $50
- Usually ready in 1–3 days
Roblox thumbnails
More gaming thumbnails
There are only a few Roblox pieces in the portfolio so far, so the rest of the gaming work is below them.
What I make for Roblox channels
- Obbies and towersThe drop, the height or the jump everyone fails, with your avatar right in it.
- ChallengesThe rule and the stakes in a few words, readable on a phone.
- Meme and trend gamesThe game’s own look and joke, with your avatar selling the reaction.
- New games and updatesThe new thing front and centre, big enough to recognise from the feed.
How it works
What to send for a Roblox thumbnail
- Your avatarYour username, or a screenshot of your avatar from the front.
- The gameIts name and a few screenshots of the part the video is about.
- The momentWhat happens, and the reaction you want the thumbnail to show.
- TextThe words you want on it, if any.
From brief to finished thumbnail
- Submit a briefTell me what you want, drop reference links or files, or just say “creative freedom.”
- Get a quote & dateI reply with a quote and an estimated completion date based on scope and your budget.
- Pay the depositA deposit is required to book the project and get it into the queue.
- Review a watermarked previewYou'll see a watermarked preview before final files are delivered, so you can request changes first.
- Get your final filesOnce you approve the preview and the remaining balance is paid, final files are delivered ready to use.
Check a thumbnail yourself
Free tools that run in your browser. Nothing is uploaded.
- YouTube Thumbnail PreviewerSee your thumbnail and title among other videos.
- Thumbnail Safe ZoneSee what the badge, bars and buttons cover.
- YouTube Thumbnail RaterA design score out of 100 with feedback.
Need a thumbnail for your next video?
Send the idea and I’ll reply with a quote and a date.
Thumbnail orders are closed right now
Join the Discord to hear first when they open.
Free tools for creators
Useful tools for YouTubers, artists, designers and producers. 39 tools, all free, with no sign-up.
39 tools
No tools match . Try a plainer word for what you want to do, like “resize”, “cut”, “convert” or “thumbnail”.
Files you open are processed in your browser and aren’t uploaded. The exceptions are stated on their pages: the YouTube previewer, downloader and the Thumbnail Rater’s YouTube-link option load public images and video details from YouTube, and the Rater’s AI review sends your thumbnail to an AI service, only when you press Rate thumbnail.
Guides
All guides ↗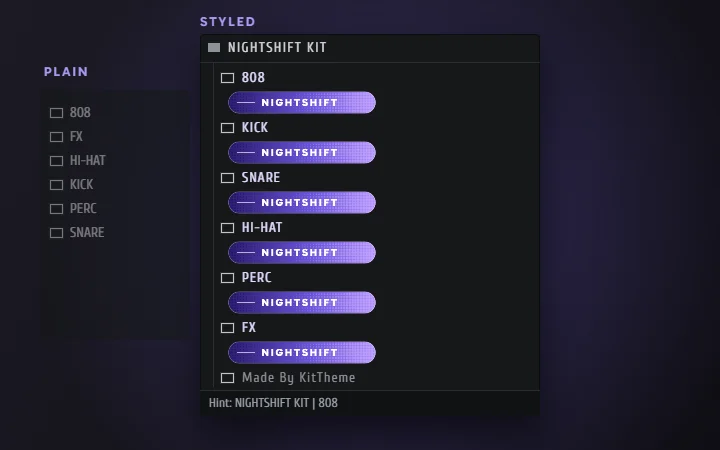
Everything your drum kit needs except the sounds.
Make folder banners, colors and hover text for FL’s Browser without Photoshop, and preview it as you go. Bring the sounds. KitTheme handles the look.
Open KitTheme ↗I'm not taking new design projects right now.
Commissions are currently closed. Beats and VSTs are still available, and you're welcome to reach out on Discord to be notified when they reopen.
Tell me about your project.
A few quick questions, one at a time. I'll reply with a timeframe and quote. How payment works is covered near the end.
- Made from scratch, any style
- Revisions included on every project
- Watermarked preview before final files
Other ways to reach me
No need to fill out a form if you'd rather just talk first.
Discord (fastest)
Best for quick questions, sharing references, and getting the fastest replies.
Join the DiscordPayment
CashApp, Venmo, Apple Pay, or card via Stripe. Usually a deposit after your quote, but you're also welcome to pay upfront if you'd rather not wait.
Prefer to just chat first?
Discord is the fastest way to reach me.
Everything for sale
Nothing matches
Try a wider price range.
Review your order
This page doesn't exist.
The link may be old or mistyped. Everything that's still here is a click away.